My previous blog post described how to set up your own private Maven repository with Artifactory in 30 minutes. This second and final part will make things more interesting and take your setup to the next level.
You will learn how to:
- handle library projects with dependencies
- securely provide username and password
- work with snapshot and release builds
- configure custom repositories
- manage user access
All source code is available on Github as usual.
Note that the material presented here can quite easily be extended to be applicable beyond Android.
Library projects with dependencies#
Imagine if your Android library project itself has dependencies. Then the application using the library wouldn’t be able to run unless it provides all dependencies the library requires.
To better understand this, consider the new AwesomeAdvancedLibrary which makes use of Guava to awesomize a String. The application using this library should be agnostic of this dependency. Hence we do not want to define two dependencies:
dependencies {
    compile 'com.jeroenmols.awesomeadvancedlibrary:awesomeadvancedlibrary:1.0.0'
    compile 'com.google.guava:guava:18.0'
}
Instead one compile dependency should suffice to use the library.
Important note on including dependencies
You can skip this if you want, just some extra context
Including dependencies in your library is not always a good idea, because this can lead to a dependency conflict while integrating. I only choose Guava to keep things simple, but it is actually a very bad example as it is a utility library. This means it’s quite likely that the app also needs it.
A better example would be a universal analytics library offering a universal API to track analytics and redirecting all calls internally to one or more analytics providers. Here packaging dependencies makes sense, because the app never needs to talk to the dependency directly. It also hides implementation details, so the app doesn’t need to be modified when switching to a new provider.
Imagine if we would simply resort to the buildscript we had in my previous blogpost. At compile time the Guava dependency will not be included, because the would make the library unnecessarily large. Instead, the compiler will tell the library: “don’t worry about this dependency, the app will provide it for you.”
The app on the other hand wouldn’t have a clue which dependencies the library actually needs (how would it?) and hence the app will compile just fine. However, after starting the app and trying to access the library, the app would crash at runtime:
08-09 20:49:46.096  28892-28892/? E/AndroidRuntime﹕ FATAL EXCEPTION: main
Process: com.jeroenmols.awesomeadvancedapplication, PID: 28892
java.lang.NoClassDefFoundError: Failed resolution of: Lcom/google/common/base/CharMatcher;
    at com.jeroenmols.awesomeadvancedlibrary.AwesomeConvertor.toAwesome(AwesomeConvertor.java:11)
To solve this, we need to ensure that the library pom.xml file contains the right dependencies by manually adding the pom.withXml{} element to the publishing task:
publishing {
    publications {
        aar(MavenPublication) {
            groupId packageName
            version = libraryVersion
            artifactId project.getName()
            artifact("$buildDir/outputs/aar/${project.getName()}-release.aar")

            pom.withXml {
                def dependencies = asNode().appendNode('dependencies')
                configurations.getByName("_releaseCompile").getResolvedConfiguration().getFirstLevelModuleDependencies().each {
                    def dependency = dependencies.appendNode('dependency')
                    dependency.appendNode('groupId', it.moduleGroup)
                    dependency.appendNode('artifactId', it.moduleName)
                    dependency.appendNode('version', it.moduleVersion)
                }
            }
        }
    }
}
Note that while you can similarly add other repositories in this way to the pom.xml, Gradle itself won’t look for repositories in that file. Therefore if you use libraries from 3rd party repositories, you still need to add those repositories to the build.gradle of your app.
Securely provide username and password#
Obviously we do not want to store a plain text username and password in any file that we check in to our version control system. So to make sure we hide those, create a gradle.properties file in the root of your project and add the following content:
artifactory_username=admin
artifactory_password=password
Then in your build.gradle file, refer to the properties like this:
username = artifactory_username
password = artifactory_password
We have now obfuscated the password, so it is no longer in the build.gradle file, but people can still find it in the gradle.properties file under version control. To prevent this, you must do one of the following:
- Don’t add
gradle.propertiesto your version control system. (add it to your.gitignorefile instead) - Move the
gradle.propertiesto the base~/.gradlefolder on your hard drive. I personally recommend this approach as you can never accidentally check in your username and password.
Working with Snapshot and Release builds#
While the Artifactory Gradle plugin doesn’t have support for snapshot/release builds out of the box, it is easy to add this functionality by relying on the artifact version:
- For release builds: use symantic versioning e.g.
1.0.0 - For Snapshot builds: use symantic versioning with
-SNAPSHOTsuffix e.g.1.0.0-SNAPSHOT
Now you can direct each one to a different Artifactory repository by changing the repository key as follows:
repoKey = libraryVersion.endsWith('SNAPSHOT') ? 'libs-snapshot-local' : 'libs-release-local'
On the application side you need to add two different Maven urls so you can refer to artifacts in both repositories.
allprojects {
    repositories {
      maven { url "http://localhost:8081/artifactory/libs-release-local" }
      maven { url "http://localhost:8081/artifactory/libs-snapshot-local" }
    }
}
Referencing artifacts is exactly the same as before, just don’t forget to add the -SNAPSHOT suffix for snapshot artifacts.
Alternatively we can also create a virtual repository in Artifactory which wraps around both repositories. This way the app only requires one URL, but does create a dependency on the existing Artifactory setup.
- Login to Artifactory and go to admin > repositories > virtual
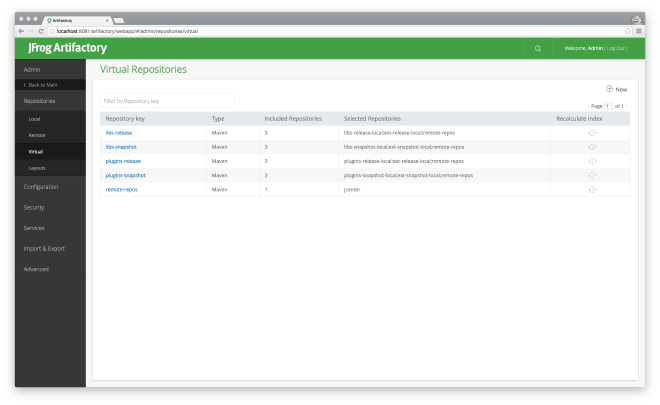
- Create a new virtual maven repository which contains both
libs-release-localandlibs-snapshot-local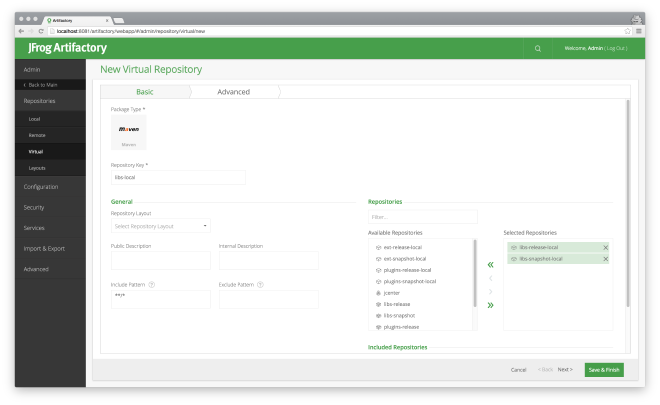
- In the top level
build.gradleof your application, replace the two previous URLS by the following:
allprojects {
    repositories {
      maven { url "http://localhost:8081/artifactory/libs-local" }
    }
}
User access management#
Currently everyone can both read and write to all your repositories. This is not a good idea, especially if your server is also connected to the internet. Therefore we are going to set up two different users: one to deploy artifacts and one to consume artifacts.
In order to do so, go to artifactory and login as admin. Now navigate to admin > security > general and make the following changes:
- set
Allow Anonymous Accessto false -> ensures only known Artifactory users can consume artifacts - set
Password Encryption PolicytoREQUIRED-> ensures we don’t have to hardcode a plain text password in ourbuild.gradle. - press the
encryptbutton in thePassword Encyptionsection -> encrypts all passwords
If the app now tries to consume an artifact, it will get a 401 error: unauthorized. You can verify this yourself by clearing the gradle cache (to force a dependency download):
gradle clean --refresh-dependencies
Next, go to the Users pane and add two new user: consumer and deployer. Make sure not to add them to any group.
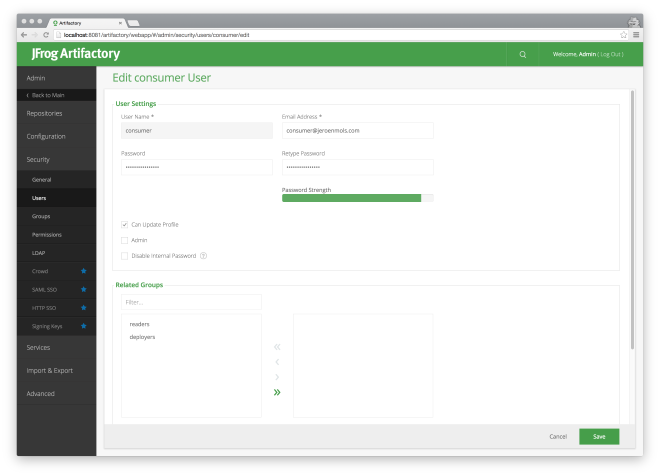
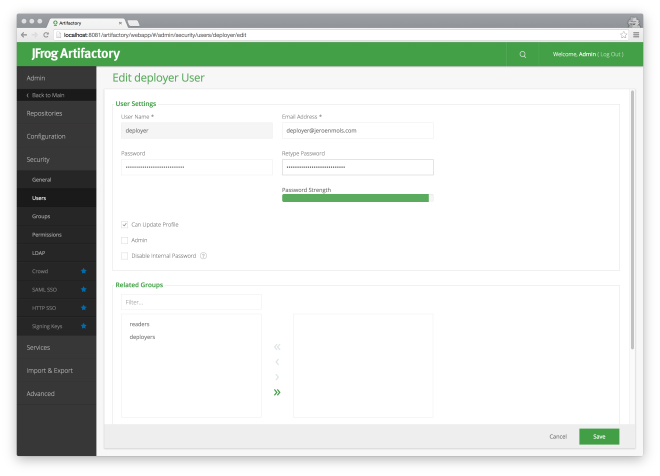
Note that you probably also want to change your admin password at this stage. ;)
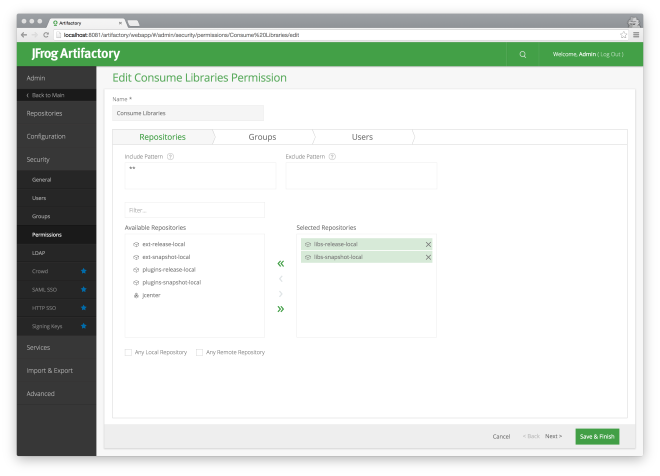
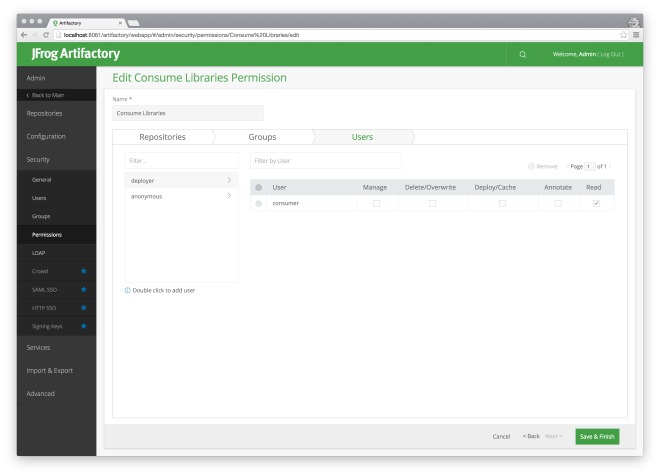
Now go to the Permissions pane and add a new Consume Libraries permission. Set the Selected repositories to include the snapshot and release repository, and in the Users tab add the consumer user with read permissions.
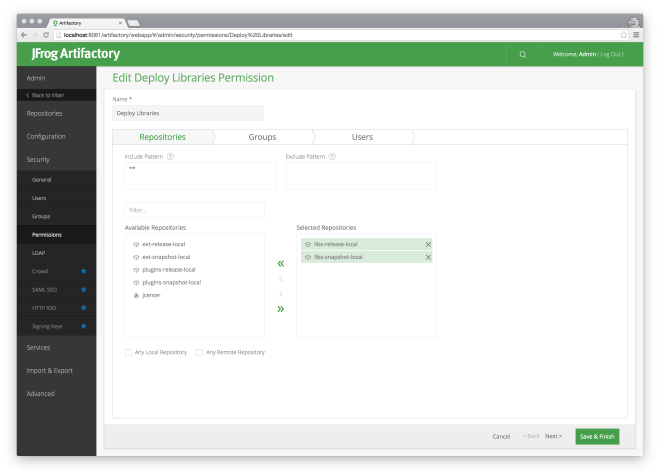
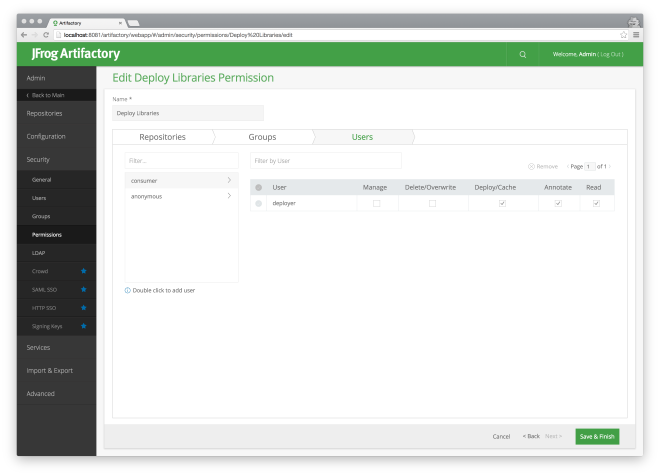
Add a second permission: Deploy Libraries with the snapshot and release repository included. Here give the deployer user Deploy/Cache permission but not Delete/Overwrite as you never want to override an existing artifact!
All we need to do now is modify the Library and Application to make use of these new users. This is easy for the Library as you can simply replace the admin user with the deploy user in the gradle.properties file.
For the Application we will need to provide credentials to access the Maven repository. Here we will hard code the username and password in the top level build.gradle file because team members should be able to checkout and build the code without extra configuration.
Therefore we will take some extra security precautions:
- Use a user with read access to only a small subset of our repositories:
deploy. - Check the code into a private repository, so the hardcoded password is protected by repository password.
- Use the encrypted version of the password instead of the plain text version:
Login to artifactory as the
consumeruserNavigate to the user settings in the top right corner
Unlock your profile with your password
Copy the API key
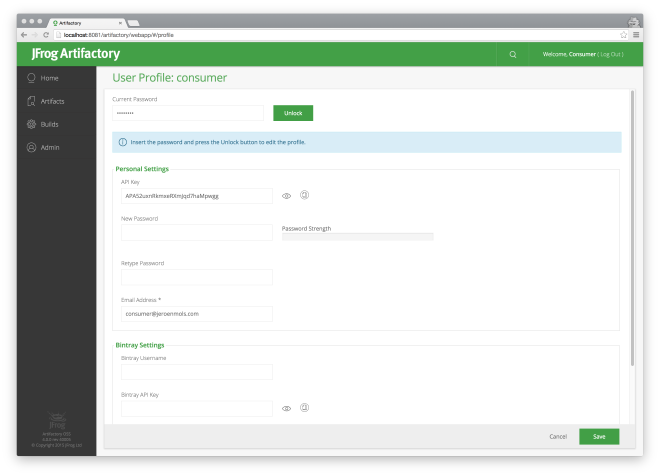
Now add the user authentication to the top level build.gradle file:
allprojects {
    repositories {
        jcenter()
        // NOTE: configure your virtual repository and user in artifactory to make this work
        maven {
            url "http://localhost:8081/artifactory/libs-local"
            credentials {
                username 'consumer'
                password 'APA52uxnRkmxeRXmJqd7haMpwgg'
            }
        }
    }
}
And we are all set with authenticated access to our repositories.
Wrap-up#
That’s a wrap to my two part blogpost about Artifactory! We made our previous repository a lot more secure, added support for dependencies and can now differentiate between release and snapshot artifacts.
No more excuses not to write reusable code!
Feel free to leave a comment and don’t forget to check the full source code on Github.
